How to Train a FLUX Model on Your Own Images: A Complete 3-Stage LoRA Pipeline (2026)
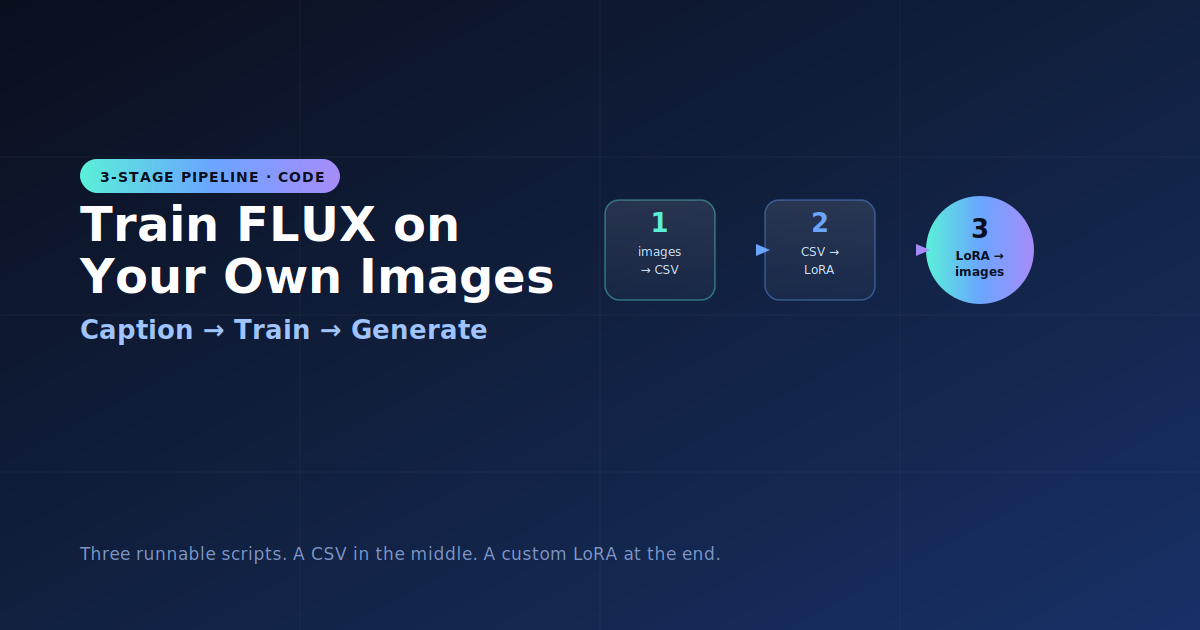
Most FLUX tutorials give you one giant script and hope it runs. This guide does something more practical: it splits the whole job into three small scripts you run in order, with a plain CSV as the handoff between them. You drop images into a folder, caption them, edit the captions, train, and generate — each stage independent, inspectable, and rerunnable.
This pipeline is the cleaned-up, working version of a common DIY approach. If you've ever written your own FLUX/Stable-Diffusion trainer and watched the loss drop while the model learned nothing, the training stage here fixes exactly why that happens.
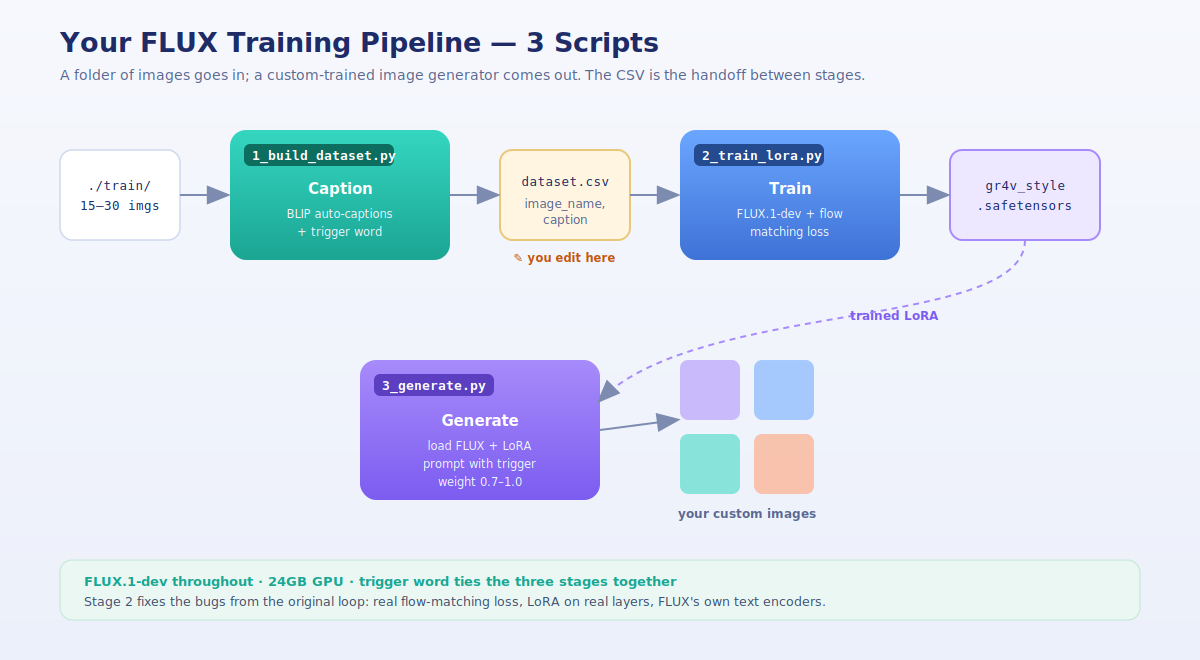
The Architecture: Three Scripts, One CSV
| Stage | Script | Input | Output |
|---|---|---|---|
| 1 | 1_build_dataset.py | folder of images | dataset.csv (image_name, caption) |
| 2 | 2_train_lora.py | the CSV + images | gr4v_style.safetensors (LoRA) |
| 3 | 3_generate.py | FLUX + the LoRA | your custom images |
The trigger word (gr4v_style in the examples) is the thread that ties all three together: it's written into every caption in Stage 1, learned in Stage 2, and typed into prompts in Stage 3.
We use FLUX.1-dev throughout. It's gated, so before anything else, accept the license on its Hugging Face page and authenticate:
huggingface-cli login
Don't substitute FLUX.1-schnell for training — it's a 4-step distilled model and the distillation fights LoRA learning. Schnell is fine for fast generation, but train on dev.
Stage 1 — Build the Dataset CSV
The first script scans your image folder, auto-captions each image with BLIP, prepends your trigger word, and writes a two-column CSV. You then open that CSV and edit the captions before training — this manual pass is where good LoRAs are made.
python 1_build_dataset.py --images ./train --out dataset.csv --trigger gr4v_style
The core of the script:
inputs = processor(image, return_tensors="pt").to(device)
out = model.generate(**inputs, max_new_tokens=40)
caption = processor.decode(out[0], skip_special_tokens=True).strip()

full_caption = f"{trigger} {caption}"          # trigger sits at the front
rows.append({"image_name": p.name, "caption": full_caption})
It produces a CSV like:
image_name,caption
img_001.jpg,gr4v_style a man seated at a desk, navy shirt, office background
img_002.jpg,gr4v_style outdoor portrait, green park, overcast light
img_003.jpg,gr4v_style full body on a city street at night, casual outfit
The captioning rule that decides everything
Caption what you DON'T want fused to your trigger word. Whatever you leave undescribed gets absorbed into the trigger.
If you're training a person, don't describe their face or identity — leave it out so it binds to the trigger and the trigger learns to summon that face. Do describe the variable stuff (clothing, pose, background, lighting), so those stay controllable at generation time. For a style LoRA, invert it: describe the content but not the stylistic qualities (palette, brushwork), so the look attaches to the trigger.
This is also the key fix over a naive dataset builder. A common early mistake is writing image paths into a column called input_ids — that's not a usable caption file. Here we write clean image_name + caption columns that Stage 2 reads directly.
Stage 2 — Train the LoRA
The second script reads the CSV, finds each image, and trains a LoRA on FLUX.1-dev.
python 2_train_lora.py --csv dataset.csv --images ./train \
    --trigger gr4v_style --out ./flux-lora-out --steps 1000
This stage is where most hand-rolled trainers quietly fail. Here are the four fixes baked into it — each one is a real bug that produces a script that runs and trains nothing.
Fix 1 — FLUX is a transformer, not a UNet
FLUX has no unet. You load FluxPipeline and adapt its .transformer (a flow-matching DiT). Any code iterating pipeline.unet.named_modules() for FLUX is operating on the wrong architecture.
Fix 2 — Actually attach the LoRA
The single most common silent failure is an empty target list:
target_modules = [] # ✗ LoRA attaches to NOTHING; optimizer trains nothing
The fix targets FLUX's real attention projections, then verifies the attachment worked:
lora_config = LoraConfig(
    r=16, lora_alpha=16, init_lora_weights="gaussian",
    target_modules=["to_q", "to_k", "to_v", "to_out.0"],
)
pipe.transformer.add_adapter(lora_config)

trainable = [p for p in pipe.transformer.parameters() if p.requires_grad]
if sum(p.numel() for p in trainable) == 0:
    raise SystemExit("LoRA attached to nothing — aborting.")
That guard alone saves you from burning GPU hours on a no-op run.
Fix 3 — Use FLUX's own text encoders
Another classic bug: pulling in an external clip-vit-base-patch16 (512-dim), hitting a shape mismatch against the model, and bolting on an untrained nn.Linear(512, 768) "projection" to silence the error. That random layer corrupts your conditioning. FLUX ships two encoders (CLIP + T5) inside the pipeline — use them and dimensions just match:
prompt_embeds, pooled_embeds, text_ids = pipe.encode_prompt(
    prompt=caption, prompt_2=caption, max_sequence_length=512, device=device,
)
Fix 4 — The real flow-matching loss
This is the big one. A loop with loss = outputs.mean() or mse_loss(outputs, latents) minimizes a number while learning nothing. FLUX uses flow matching: interpolate between the clean latent and noise at a random timestep, and train the model to predict the velocity.
noise  = torch.randn_like(latents)
t      = torch.sigmoid(torch.randn(bsz, device=device))   # timestep in (0,1)
t_     = t.view(bsz, 1, 1, 1)
noisy  = (1.0 - t_) * latents + t_ * noise                # x_t
target = noise - latents                                  # the velocity

model_pred = transformer(
    hidden_states=packed, timestep=t, guidance=guidance,
    pooled_projections=pooled, encoder_hidden_states=prompt_embeds,
    txt_ids=text_ids, img_ids=img_ids, return_dict=False,
)[0]

loss = F.mse_loss(model_pred.float(), target.float())     # the real objective
The script also caches every image latent and text embedding once up front, so each training step is just the transformer forward/backward — faster and far lighter on VRAM. Checkpoints save as .safetensors (not an unloadable .pth) via save_lora_weights, so Stage 3 and ComfyUI can read them.
Parameters worth knowing
--steps— aim for roughly 40 × number of images (1,000 is a safe default).--rank— 16 for a subject, 32 for a style.--lr—1e-4is a solid FLUX starting point.--grad_accum— effective batch size without the VRAM cost.
Your LoRA lands at ./flux-lora-out/gr4v_style_step1000/.
Stage 3 — Generate With Your LoRA
The final script loads FLUX, applies your trained LoRA, and generates from prompts containing the trigger word. It's the LoRA-aware version of a standard generation service (you can re-add S3 upload, database logging, and webhooks around this core once it works).
Single image:
python 3_generate.py --lora ./flux-lora-out/gr4v_style_step1000 \
    --prompt "gr4v_style a cinematic portrait, golden hour" --out result.png
Batch from a prompt file:
python 3_generate.py --lora ./flux-lora-out/gr4v_style_step1000 \
    --prompts prompts.txt --outdir ./generated
The essentials:
pipe = FluxPipeline.from_pretrained(base_model, torch_dtype=torch.bfloat16).to(device)
pipe.load_lora_weights(lora_path)
pipe.set_adapters(["default_0"], adapter_weights=[0.9])   # LoRA strength 0.7–1.0

image = pipe(
    prompt="gr4v_style a cinematic portrait, golden hour",
    num_inference_steps=28, guidance_scale=3.5,
    height=1024, width=1024,
).images[0]
Always run a prompt sweep
Don't judge a LoRA on a single image. Generate the same prompt at LoRA weights of 0.6, 0.8, and 1.0 across a few seeds. Too weak and the subject barely appears (under-trained); every image identical and stiff means over-trained. That sweep tells you instantly whether to adjust steps or learning rate and retrain.
Putting It All Together
# 1. caption images -> CSV, then hand-edit dataset.csv
python 1_build_dataset.py --images ./train --out dataset.csv --trigger gr4v_style

# 2. train the LoRA from the CSV
python 2_train_lora.py --csv dataset.csv --images ./train \
    --trigger gr4v_style --out ./flux-lora-out --steps 1000

# 3. generate with your trained subject
python 3_generate.py --lora ./flux-lora-out/gr4v_style_step1000 \
    --prompt "gr4v_style on a mountain trail at sunrise" --out hero.png
Two Honest Caveats
- Hardware. FLUX LoRA training wants a 24GB GPU; 16GB works only with extra offloading. The cache-once design and gradient checkpointing in Stage 2 are what make it fit at all.
- Library drift. The diffusers helper methods used in Stage 2 (
_pack_latents,_prepare_latent_image_ids,_unpack_latents) are stable in current releases but occasionally move between versions. If you hit anAttributeErroron one, check your installed diffusers version against the latest FLUX example scripts.
The Bottom Line
A custom FLUX model isn't one monolithic script — it's a pipeline: caption to a CSV you can read and fix, train with the correct flow-matching objective, then generate with your trigger word. Splitting it into three stages makes every step debuggable, and getting the training loss right (predict the velocity, attach LoRA to real layers, use the model's own encoders) is the difference between a generator that learns your subject and one that just prints a falling number. Build it once, and you've got an infinite, on-brand image source.
Scripts target FLUX.1-dev with diffusers ≥ 0.32 as of mid-2026. Confirm base-model licenses permit your intended use, and verify a run actually learned by generating with the trigger word — a decreasing loss alone proves nothing.